1.26.2011

My New Lamp

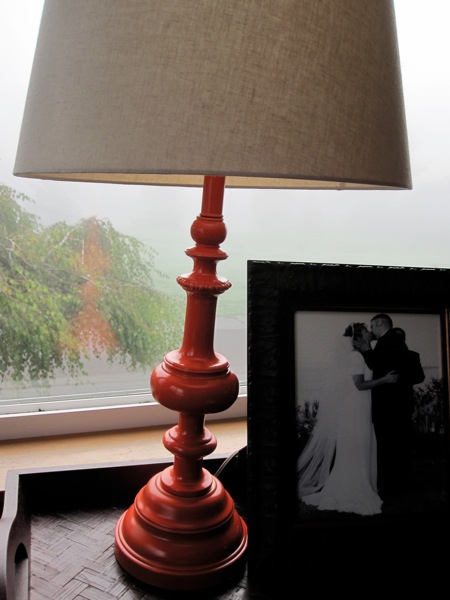
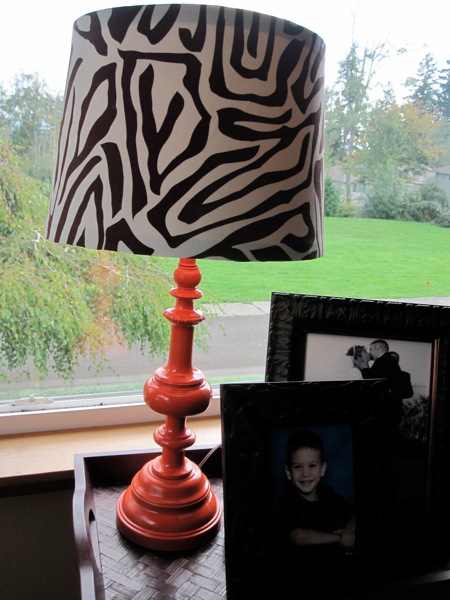
Of course I got too excited about this project to bother with a before picture (ugh!) I picked up this lamp at Goodwill. It was a very ugly old brass lamp. The Goodwill out here is a little frustrating. Usually there is not much there because the DIY-ers pick through it all pretty fast, and they are also pretty expensive believe it or not. Ugly old pictures are like $30! So I was surprised to find this lamp for 4.99. There is a before and after of the lampshade though...
IMG_1308.jpgIMG_1320.jpg

We decided to name him Steve. He brightens up our living room - oops haha -no pun intended.

This is a super easy project! Get a lamp, get some spray paint. Tape off the cord and top socket. Spray in light layers so you don't have drips. Do a few coats..

For the lamp shade get ye some spray adhesive! (amazing stuff never be at home without it!!!) Get a lamp shade and a chunk of fabric. Spray the lampshade outside and slowly roll the fabric onto the shade smoothing out bubbles. Trim anything that is hanging over, or fold it under. Add trim if you like. You can also use some more fabric and fold it on itself to use as trim.

Here is a picture of my friend Naomi's lamp. She had all these beautiful vintage clothes, and she just loved the fabrics. So we took one of the dresses, an old lamp and made this lamp shade. Now she has some funky 60's inspired lighting.

IMG_4223.JPG


HouseofHepworths

1.25.2011

Stuffed Hearts

IhookedupwithHoHlamespice


This past week, I tried to be thinking of something I could do for Valentine Decor that I have not already seen on everyone's blog. I have purposefully steered clear of looking at Valentines decor posts so that I would not be inspired by someonelses project. Now I realize that a few people probably came up with the same original idea as I did, but as far as I know of this one is mine ;0)

Easy project:

1. Get some fabric scraps.

2. Cut a heart out of paper to use as a pattern

3. Cut out your hearts

IMG_1726.JPG

4. Sew them up by hand or machine. Don't worry about stitching perfect. They should look scrappy. Let the stitches get crooked. Don't forget to leave an opening on the bottom side for stuffing.

5. Stuff them, not too full - they are stuffed hearts not pillows. Let them be kinda flat.

6. Sew up the opening, (again why it is handy not to over stuff them).

7. Stick them around the house. On a skewer in a flower pot or plant. On a dresser. In a bucket or basket. Grab some clothes pins and hang them on twine, string, ribbon or even your Christmas bead garland.


You can even add a ribbon loop to hang them, or make a door hanger attaching two hearts together with ribbon and a loop for the door handle.


IMG_1748.JPGIMG_1747.JPGAnd because boys like Valentine's too...IMG_1762.JPGCut some out of boy fabric! (my boys love fireman so we have lots of fireman fabric scraps). I used pinking sheers on the banana fabric.

As I was cutting these out, I told my 6 year old we were going to put them around the house until Valentine's Day and then give them away as the Valentines for his class. He informed me that the boys would rather have candy. Once they were finished both my boys wanted to have them in their room (the 2 year old wanted to cuddle with them... ALL of them). Now the 6 year old keeps telling me who he wants to give each one to. I keep reminding him that they are all going to have candy and I'm keeping the hearts LOL. I have had some company over and the stuffed hearts are getting rave reviews. We'll soon know if they are a hit when we see the 1st Graders reaction to their Valentines.

If you like these.... I LOVE comments and respond to them all! I also ADORE all my followers!

Visit thecsiproject.com

Today's Creative Blog


HouseofHepworths

1.24.2011

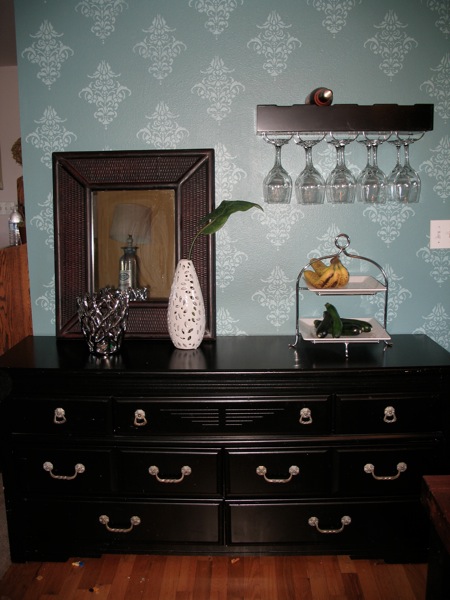
Dinning Room Getting Closer!

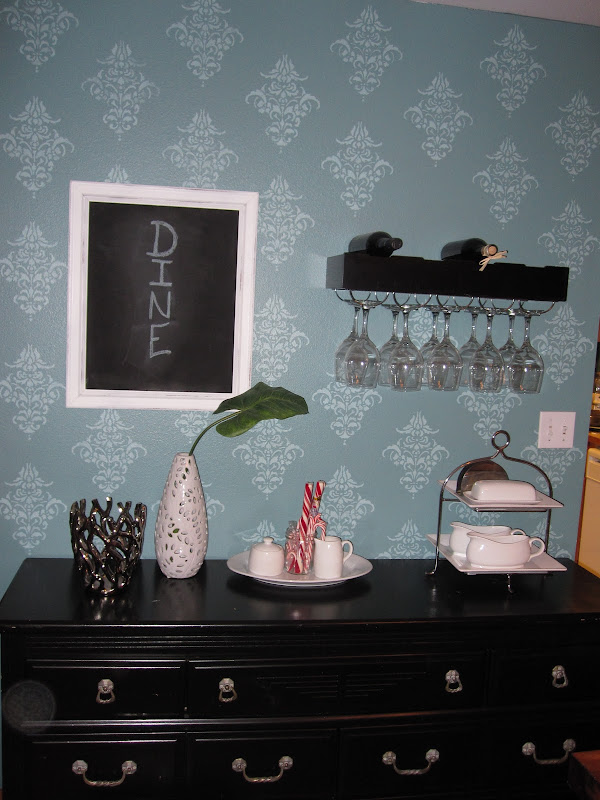
Last spring I painted my wall to look like wallpaper, using leftover paint. I absolutely love how it turned out, but I have been having trouble finding something to hang on it and accessorizing the buffet bellow the wine rack.

IMG_6106.jpg

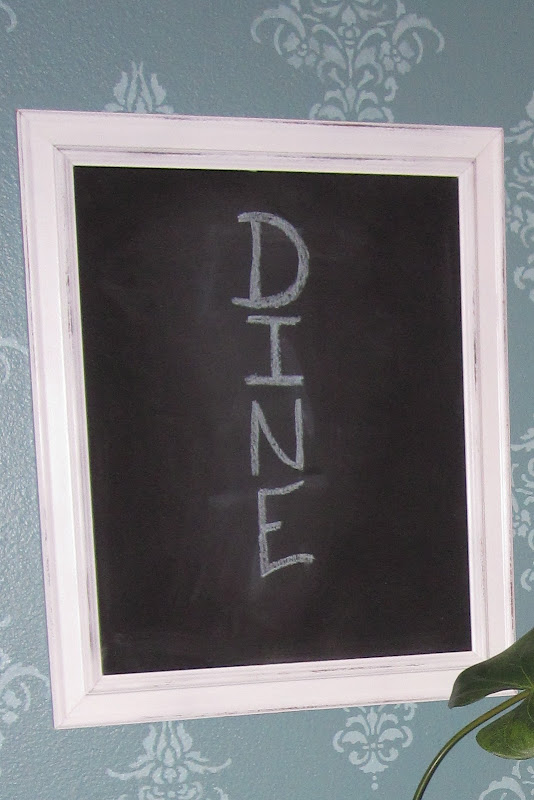
It has been very frustrating. I still need to figure out how I want the buffet accessories, but hopefully that process will be easier now that that huge old mirror is not sitting on the surface. I went brousing over at Nesters blog, and I noticed her "dwell" chalkboard and I just love it! For some reason I always think kitchen for chalkboard. Why have I never thought of hanging one in my dinning room? Seems so simple, they do it all the time in the PB catalogue. A few months ago I spray painted some old frames white to have a wall of empty white frames (which did not end up working out for me, what a blunder...lets not go there). So off I went and grabbed the largest of the frames and sanded it down some.

IMG_1708.jpg

Then I took the old picture that was in there (which was stuck to cardboard), I turned it around and sprayed chalk board paint on it and slapped it on the wall. I still need to work on the buffet accessories, (as you can see my children don't want the candy canes to leave yet).

IMG_1706.jpg

Maybe down the road I will find something I like better for this wall but for now my 5 minutes and $0 solution makes me smile. That is my new design philosophy. I only want things in my house that make me smile or have some sort of emotion or attachment to them. I also have great emotion when I see the bills and so they are soon going to be finding a nice out of sight home in my entryway at the bottom of the stairs where I will never see them or pay them. Well...unfortunately not never.

1.21.2011

$0 Bedroom Makeover

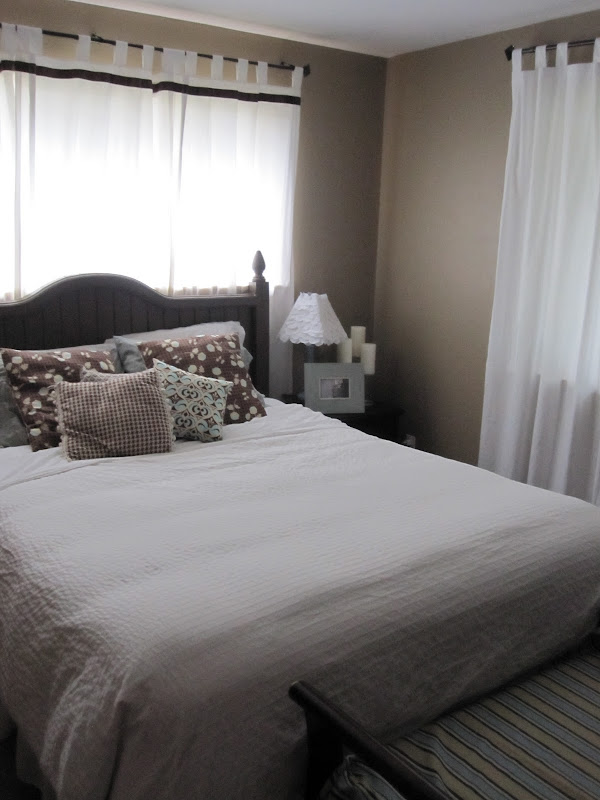
Maybe I should call it the "I finally cared what my bedroom looks like" makeover? I was visiting Nester and gazing at pictures of her fantastic home. I came across her write up of the importance of your Master Bedroom. Well...lets just say it was something I really needed to hear. So begins the journey to a decluttered, relaxing bedroom. What better decorating project for me do in time for Valentine's Day! Of course, if I am going to go and spend decorating money it's going to be on something for a main room of the house. Therefore the bedroom is going to have to be a $0 makeover. Please keep in mind this is still in some need of help. I did not pick up or buy ANYTHING. I might go and do that later, but for now this is what I had on hand....

Headboard before... (of course I forgot to take one of the room before...)

IMG_1703.JPG

After...


IMG_1774.JPG
The pillows are from the living room. I really only use one of them on the bed because my Hubby hates lots of pillows, but in my mind THIS is how the bedroom looks and occasionally I will move the pillows over to free up the couch;0)

IMG_1768.jpgI am going to cover the bench in this stripe fabric and add some more ribbon to the other set of curtains.

I ran out of white spray paint - sinful I know! So I used blue paint on the lamps, but I don't like it. I couldn't decide what color to do the headboard in. I wanted it to be white but the curtains are white and right behind it. I have a greenish tan color in storage I might try later but for now we went with Coffee Bean. I never would have picked this color, but I asked my sis-in-law what she thought as she is braver about color than I. She suggested a dark brown, sure enough a past project allowed me to dig up this color. Although, I mentioned I am not sure if I like it on THIS headboard. I might go paint the door in the basement and use it as the headboard instead because I really do like the contrast of the darker brown. And I LOVE the brown side table.

IMG_1714.JPG

As you can see in the above picture, the lamp shades looked terrible in this room so... I made some petals out of an old sheet, sewed them in a line and wrapped it around the shade using glue on the corners. Again, $0 was the key here.

IMG_1771.JPG


Here's a picture with both the side tables...Um I am still working on that last lamp shade ;0)

IMG_1775.JPG
We still have some decluttering to do, but it is already beginning to be more peaceful in there since we got the computers out! I now have empty dresser tops and I can't decide yet what to put on them. Once I get everything done, I'll post a little update.

Visit thecsiproject.com

1.20.2011

Newest Blog to Follow!

My dear friend sent me a link to her sis-in-law's new blog.  WOW!  What a creative girl!  I had been hearing from my friend how her brother married this incredibly talented woman.  In all honesty, I facebook stalked her pics before she had a blog, but now I get to follow her blog ;0) Which is probably less creepy.  I suggest you take a peek you will love her ideas too!

http://www.littlethingsbringsmiles.blogspot.com/

Here is just a sampling of all the greatness she has to share...

I love that her ideas are new, fresh and frugal!

1.19.2011

Technical Difficulties

Apologies for the disappearance of all my photos. We have no idea what is going on with my site at the moment, but hope to have the issue resolved soon ;0) Please try back again later!

*** Update apparently photos are gone for good. I will try and dig them out and slowly put them back up.

My creative brother

My brother the creative type LOL!  He comes up with the most original ideas, I love it.  It's crazy too that we have completely different ideas and takes on things.  Like day and night.  He wanted to do a nice display as a gift for a friend and he asked my help.  It feels so good when someone who is more creative than you asks for your advice. Anyway, here is our joint effort (he really did all the work, I only made some minor suggestions).  I wish the photo was more clear, but you get the idea.  Isn't it great!  He was trying for a kind of Juicy Couture meets Christmas kind of feel. When he sent me this pic of the final product, I couldn't believe how it turned out!  He did a fantastic job!!!

He found everything at the dollar store, or the thrift store!  Except that little flower ring in the jewelry box which I found online for him at Forever 21 for 3.99!!! (my contribution LOL)

photo.JPG